How I make prototypes
If you want to make a board game, then you are going to need to make prototypes and the way you achieve this should change as you progress your design.
In this article I’m going to detail how I would approach making prototypes for my first game today, which means keeping it effective and cheap.
Step 1. Pen and paper
The very first prototypes I make for a game are just pen and paper.
I have a small box of standard cubes and pawns I use as markers, for cards I’ll use cheap blank cards, and for dice I’ll place small round stickers over existing dice. These are all things that can be purchased cheaply on Amazon, and you can slowly add to over time for future games as you get samples and parts from manufacturers.
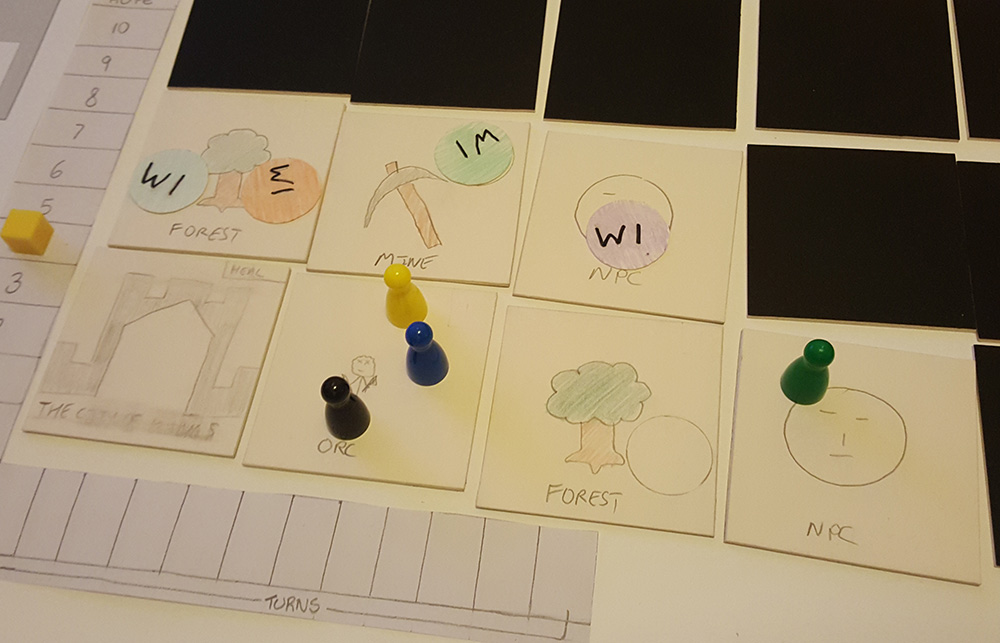
The most important part is just to get something on the table that you can play, it doesn’t need to look good and I’d go as far to say the colouring of the trees in the above image was wasteful.
If you can start to make something that’s playable and fun by hand, then you will be able to iterate quickly and refine the game as you test it. Personally, I’m a big fan of writing on cards, tweaking numbers, and changing things during playtests (early on) and not having to go reprint/cut anything to make a change.
Step 2. Simple refinement
When I feel the core gameplay is working and I start adding more content (additional cards etc), I’ll start making basic templates on my PC. Things that can be printed multiple times and populated with different information.
For cards, I’ll roughly cut them and put them into card sleeves to give the paper some thickness, for most other things I’ll leave them just as paper on the table.
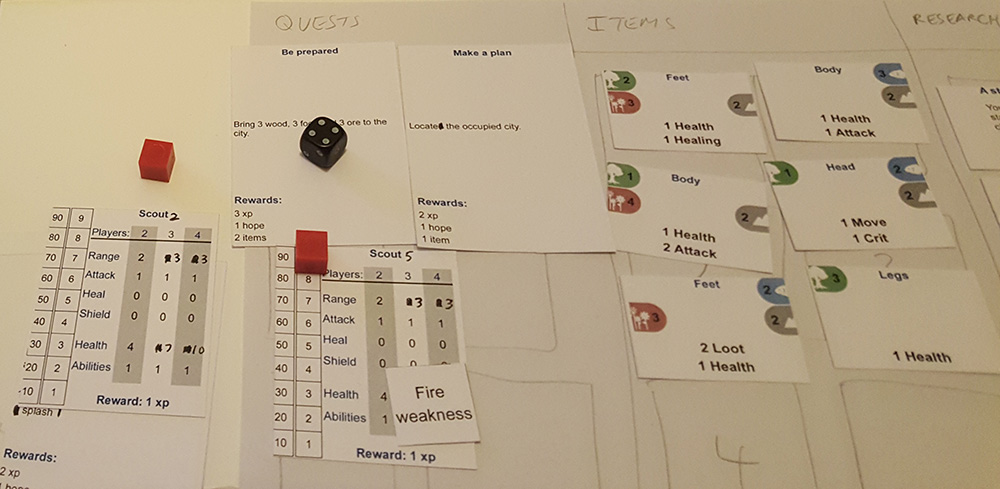
The prototype will quickly become a hybrid between handwritten and printed materials where I focus on the quickest path to the table. Meaning, whatever option allows me to update the prototype the fastest is the best option.
Step 3. Bringing it together
I often spend several months in steps 1 and 2 and will only move to step 3 as I find myself moving from designing systems to refining balance.
This lines up pretty closely with my playtesting process.
At this point I want my prototypes to start representing my vision for the final look and feel of the game. It’s important to be testing the usability of components, effectiveness of icons, readability and many other aspects alongside the gameplay.
The first step is to print at home with a coloured printer, cutting things out and using everything at paper thickness.
As with previous steps, cards go into sleeves to add some thickness.
While it can be desirable (especially with your first game) to start ordering nice prototypes, it’s expensive, takes time for them to arrive, and you’re still likely to make a lot of changes and printing everything again.
Step 4. The local printer
At this stage much of the game is designed, the graphic design and illustrations are being tested and I can be confident there will be few changes moving forward. I’m now looking to expand to a wider testing group and have nicer looking prototypes to remove the fiddlyness of paper while adding a more real experience to playing.
My cheat here is I use local printers and print A3 ( 11.7 in x 16.5 in) posters on thick poster paper. I’ll put as many tokens, boards, and pieces on each poster as possible to save money, and request 20 copies of each poster.
I’ll then spend an evening watching Netflix while cutting everything out.
There are plenty of other options here where you can use professional services like Gamecrafter or Board Games Maker, but these are going to be very expensive and if you’re looking to save money, they are not required.
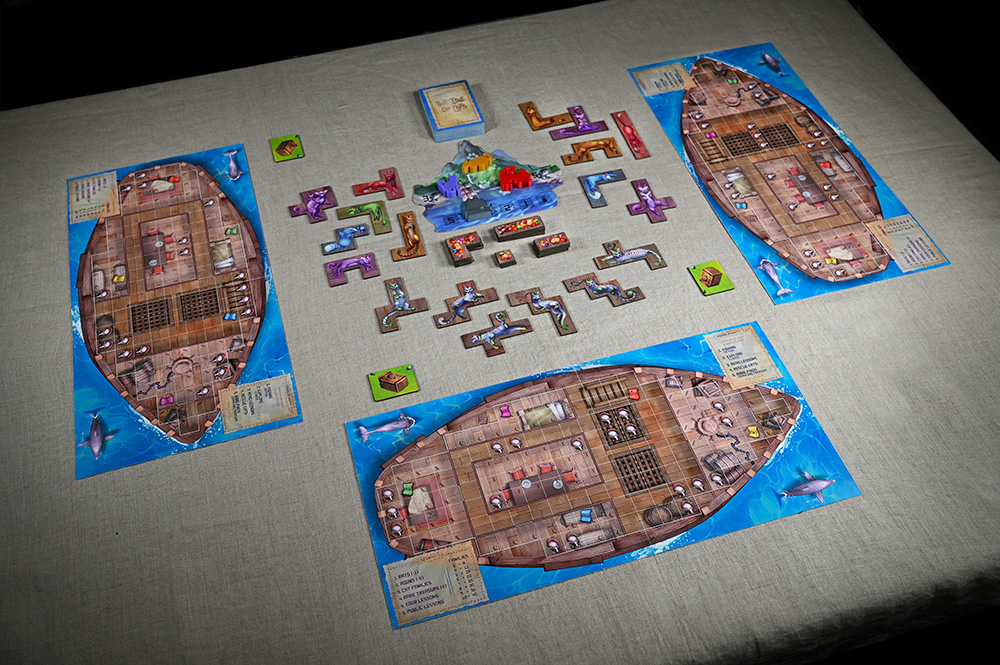
Most of the pieces in the above photo were made in this way, with the prototype in this picture costing around $15 – $20 to make in total.
I am now lucky enough to have a 3d printer which I can use for creating figures like the cats in the above image, but if this is outside your price range you may be able to find someone who will print some for you for a small fee.
Step 5. The final prototype
These days I do like to go a step further, and while my first games were successful just using the above approaches, I am lucky enough to have a little more money to be able to invest into developing games.
Once I am confident the game is finished and I want to create review and media content copies for pre-orders or crowdfunding, I use Board Games Maker.
I use their services for punchboards (all cardboard tokens), boxes, and playing cards. Their service is great, the quality is very high, and they ship worldwide.
I’ll still use my local printer for playerboards and anything that sits on the table without being moved during the game.
The golden rule
Here’s my golden rule for creating prototypes:
Every time you decrease the frequency in which you change your prototype, you can increase the quality of your prototype.
Frank West
Frank West is a gamer and designer based in Bristol, UK. He published his first board game, The City of Kings, in 2018 and now works on other games and organising events in the local area. His goal? To design and publish games focusing on immersive themes, fun mechanics and beautiful components. If you have any questions or would just like a chat, feel free to get in touch at any time!
6 comments
Peter
7th May 2024 at 2:18 pm
Your blog on prototype making was a useful read. I am in that position now, as a first-time-ever designer.
Do you know of any UK based printers that do prototypes?
Frank West
8th May 2024 at 10:12 am
Hi Peter,
I’m afraid I can’t recommend any UK companies that will be able to produce full prototypes of your game. I typically make things by hand up until the point I want a more real prototype, and then I use Board Games Maker for most things.
I do use instantprint (a national website) for player boards and game boards, where I effectively print them as posters and then cut them out. You could also use them for cards if you’re happy to cut them out yourself.
Another option is Ivory who are a UK company that make some game components but I haven’t personally used them so can’t comment on the final quality or service.
I hope this helps a little!
Chris Long
24th March 2026 at 6:12 pm
HI again Frank,
quick question, did you every use that first prototype to demo at expos?
Chris
Frank West
25th March 2026 at 10:30 am
Hey Chris,
I didn’t exhibit at any conventions until after my first Kickstarter had funded. It wasn’t something I considered necessary, I invested the time and money I had at the time into other things. I did use the prototype to playtest with a variety of different people (friends and strangers) locally though!
-Frank
Chris Long
26th March 2026 at 7:40 am
Thanks Frank,
Yes I’ve used my prototype for playtesting. But I decided to go all in on UKGE with demoing, as I’m planning to launch October, but I won’t have full pre production copies. So it interesting to see what others did pre launch. My aim at the expo is to create interest and sign ups, as well as public demos, so hopefully it will pay off. My demo copy is all hand painted looks great, but obviously isn’t production level. So I am trying to swop any components I can get manufactured before then.
Just wondered if you had done any of that.
Chris
Frank West
26th March 2026 at 11:03 am
I think this sounds absolutely fine and is the right approach, very few creators will have production level prototypes at shows. As long as your presenting your game as a prototype and not finished, you will be OK.